


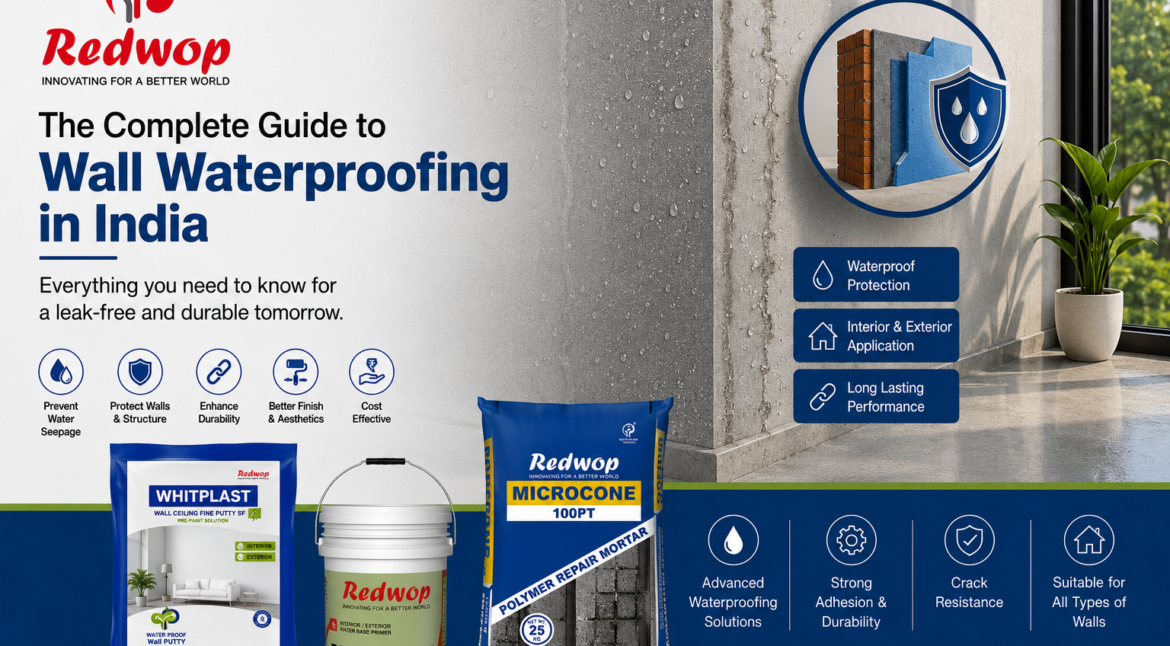
The Complete Guide to Wall Waterproofing in India
A damp wall rarely announces itself loudly. It starts with a faint discolouration near the skirting, a faint smell in a room that stays closed, or a barely noticeable white crust forming on the exterior plaster. Most people ignore it until the paint starts peeling, the wall turns green with fungal growth, or the plaster begins to bubble and fall away in chunks. By that point, what was a surface treatment problem has become a structural one.
India’s climate high monsoon rainfall, sustained humidity, wide temperature swings, and coastal salt in the air makes walls especially vulnerable to moisture damage. And yet proper wall moisture protection remains one of the most misunderstood maintenance areas in Indian construction, treated as a seasonal touchup rather than the engineered, layered system it needs to be. This guide covers everything: why walls fail, what the right repair sequence looks like, and how REDWOP’s product range addresses each stage with chemistry that actually holds.
Why Walls Get Wet: The Real Causes Behind the Damage
Before reaching for a product, it helps to understand what’s actually happening inside a wall that shows moisture damage. Water gets into walls through four main pathways and the fix depends entirely on which one you’re dealing with.
Capillary absorption is the most common and least understood. Brick and mortar are porous materials. When the external plaster or waterproofing layer degrades, moisture from rain, soil, or even high ambient humidity is drawn up or inward through the tiny pore network of the masonry rising damp in ground-floor rooms comes from exactly this mechanism. No amount of interior paint fixes this, because the moisture source is behind the wall.
Direct water ingress happens when water finds a physical path through the wall a crack in the plaster, a failed joint around a window frame, or deteriorated pointing between bricks. During monsoon, even a 1mm crack is enough to channel significant water into the wall body over hours of sustained rainfall.
Efflorescence and salt migration occur when moisture moving through brick or concrete dissolves soluble salts and carries them to the surface. As the water evaporates, the salts are left behind as the white, powdery deposit most people call “saline” on their walls. The staining is a symptom the actual problem is active moisture movement through the wall.
Foundation and basement moisture is a different problem category entirely. A leaking basement wall or water seeping through a basement wall is typically driven by hydrostatic pressure from groundwater or saturated soil pressing against the foundation from outside. This isn’t capillary absorption it’s active hydraulic pressure, and it requires waterproofing foundation walls or exterior foundation waterproofing approaches rather than interior paint coatings.
Knowing which of these is at work determines whether you need interior basement waterproofing, an exterior treatment, or a full structural repair sequence.
Interior vs Exterior: Choosing the Right Approach
The debate between waterproofing basement walls from inside vs waterproofing basement walls from outside comes up on almost every project involving below-grade walls and both have legitimate use cases.
Exterior waterproofing applied to the outside face of the wall or foundation — is the more complete solution when access is available. Waterproofing basement walls from outside stops moisture at the source, before it ever enters the wall body. Exterior foundation waterproofing treatments create a physical barrier that works with drainage systems to redirect water away from the structure. When construction is at the excavation stage, exterior treatment should always be specified.
Interior waterproofing — waterproofing basement walls from inside, sealing basement walls from the interior face, or applying a moisture barrier for basement walls from the inside is the practical option on existing structures where excavation isn’t feasible. Interior basement waterproofing doesn’t stop water from entering the wall body, but it controls where that water goes and protects the interior surface from visible damage. It’s a containment approach rather than a prevention one, and it works best when combined with proper drainage management.
For above-grade walls showing efflorescence and surface dampness, the approach is different again and this is where the REDWOP seven-step system, developed specifically for saline-damaged masonry walls in Indian conditions, delivers results that paint-over-primer approaches simply don’t.
The 7 Most Common Wall Waterproofing Mistakes in India
Most waterproofing failures aren’t product failures they’re sequence failures. Here are the mistakes that cause treatments to fail within one or two monsoon cycles:
Painting over active efflorescence. The salts behind the paint continue to migrate to the surface and simply push the new paint off the wall within weeks. The substrate needs to be stripped and treated before any surface finish is applied.
Skipping the bond coat. Applying new plaster or mortar directly to old, contaminated masonry without a bonding agent results in poor adhesion. The repair delaminates when the wall expands and contracts with temperature changes.
Using a single thick coat instead of multiple thin ones. Thick single-coat plaster applications shrink unevenly and crack as they cure. Proper waterproofing in construction practice specifies multiple controlled-thickness coats for a reason.
Treating only the interior face of a wall with an exterior moisture source. No interior treatment will hold if water continues to enter the wall from outside. Both sides of the problem need to be addressed in the right sequence.
Applying waterproofing products to dry surfaces that need to be damp. Crystalline systems and bonding agents like BUTABOND SBR work through chemical interaction with the substrate — a bone-dry surface doesn’t allow the chemistry to penetrate properly.
Not allowing adequate drying time between coats. Primer applied over putty that hasn’t fully dried, or topcoat applied before primer has cured these are the shortcuts that look fine on installation day and fail within a season.
REDWOP's 7-Step Wall Waterproofing System: How It Works and Why
The following system is REDWOP’s field-validated repair sequence for walls showing saline development, efflorescence, and active moisture ingress through masonry one of the most common and most consistently misrepaired problems on Indian residential and commercial buildings. Each step exists for a specific reason, and skipping any one of them is how a repair that looks good in December fails by August.
Step 1: Surface Removal Getting to a Sound Substrate
All old putty and plaster is removed from the affected wall down to the brick layer, using a grinder or chipping tool. This isn’t just surface prep it’s the most critical step in the entire sequence. New repair materials cannot bond properly to old, salt-contaminated, or partially delaminated plaster. The new system needs to start from the brick itself.
The depth of removal isn’t optional. If any compromised plaster is left in place, it becomes the weak link that causes the new system to fail.
Step 2: Brick Surface Curing Preparing the Substrate for Adhesion
After stripping, the exposed brick surface is cured by spraying water for 24 hours. This does two things: it settles surface dust that would interfere with the bond coat, and it hydrates the masonry — which is essential for the next step to work properly. A dry, dusty brick surface doesn’t allow the bonding agent to penetrate and key into the substrate.
Step 3: Bond Coat — BUTABOND SBR
BUTABOND SBR is applied as the bonding agent between the brick substrate and the new mortar layer. Mixed at 1 part BUTABOND SBR : 1 part water : 3 parts cement, it is brushed, rolled, or sprayed evenly across the surface and left to dry for 24 hours to form the adhesion layer.
BUTABOND SBR is a modified styrene-butadiene latex it functions as a waterproofing adhesive that bonds strongly to concrete, masonry, stone work, plasters, steel, and asphalt. Its role here isn’t just to make the next plaster coat stick it also acts as a first line of concrete waterproofing at the interface, reducing porosity and preventing salt migration from continuing to push through into the repair layers above. With a bond strength of 3 N/mm² and compressive strength exceeding 35 N/mm², it creates a mechanically robust adhesion layer that holds through thermal cycling, monsoon humidity, and the stresses that cause conventional plaster to delaminate.
As a waterproofing compound within the mortar matrix, BUTABOND SBR prevents leakage and dampness, improves flexural strength to resist cracking, and enhances the overall durability of the repair mortar system.
Step 4: Plastering with Polymer Mortar — MICROCONE 100PT
MICROCONE 100PT, a polymer-modified mortar, is applied at a minimum 25mm thickness across the surface. The polymer modification is what distinguishes this from standard site-mixed mortar it controls shrinkage during curing, improves adhesion to the bond coat beneath, and delivers the structural integrity that the repair layer needs to resist the ongoing stresses of moisture exposure and thermal movement.
The curing of this layer is not rushed. Proper curing of polymer-modified mortar is essential for shrinkage control and long-term strength development. This is one of the stages where impatience most often causes repairs to crack.
Step 5: Surface Finishing — WHITPLAST SF
WHITPLAST SF, an acrylic putty, is mixed at 3 parts putty to 1 part water best done with an electric blender to achieve a completely lump-free paste and applied in 2 to 3 thin coats using a painter’s putty knife. Each coat is allowed to dry for 20 to 30 minutes before the next is applied. After the final coat has dried for approximately one hour, the surface is sanded with fine-grain sandpaper to achieve a uniform, paint-ready finish.
The purpose of this layer is twofold: it fills minor surface imperfections in the mortar, and it creates the smooth, low-porosity surface that primer and topcoat need to perform correctly. Skipping putty and going straight to primer on a textured mortar surface results in uneven paint adhesion and early peeling.
Step 6: Primer Application — PRIMER WB
PRIMER WB is a water-based primer suitable for both interior and exterior masonry surfaces. The surface must be clean and dry before primer application. Thinned with water if needed, it is applied with a brush or nap roller and allowed to dry for 4 hours. If dust settles on the surface before the topcoat is applied, a thin second primer coat is recommended rather than topcoating over contaminated primer.
The primer seals the putty surface, ensuring even absorption of the topcoat, and creates the chemical bridge between the putty layer and the final protective coating. A wall painted without primer shows patchy absorption and uneven sheen the primer is what makes the finish coat look and perform as intended.
Step 7: Final Elastomeric Coating — MAZIKCOAT
The system is completed with MAZIKCOAT, an elastomeric protective coating that delivers the long-term waterproofing solutions performance the entire system is designed to achieve. MAZIKCOAT offers excellent elongation and UV resistance, and acts as a continuous barrier against CO₂, chloride, sulphates, oxygen, and water the full range of environmental agents that degrade exposed masonry over time.
Its elastomeric nature the ability to stretch and flex with the substrate means it bridges minor new cracks that develop through thermal movement or settlement without losing its waterproof continuity. It is available in ready-to-use packs and multiple colours, making it suitable for both functional repair and aesthetic finish applications on exposed reinforced concrete and masonry surfaces.
MAZIKCOAT is genuinely one of the best waterproofing chemical coating options for exterior masonry in Indian conditions not because of marketing claims, but because elastomeric coatings are specifically engineered to handle the combination of sustained UV exposure, monsoon rainfall, and temperature cycling that degrades standard paint-based systems rapidly.
Waterproofing Different Wall Types: What Changes and What Doesn't
Concrete block walls whether interior or exterior share the same basic repair sequence as brick masonry, but with one important difference: waterproofing concrete block walls inside often reveals that the blocks themselves have higher inherent porosity than fired brick. The BUTABOND SBR bond coat is even more critical on block wall substrates for this reason, as the increased porosity means more potential pathways for moisture to migrate through the surface.
Waterproofing concrete block walls outside adds a UV and thermal exposure layer to the equation which is why finishing with MAZIKCOAT on exterior-facing block walls isn’t optional. Standard paint doesn’t have the elongation or UV stability to maintain a continuous barrier on exterior block surfaces through Indian summer temperatures.
Foundation walls require attention to both the below-grade and above-grade zones. Waterproofing foundation walls at the construction stage is always preferable but on existing buildings showing water seeping through basement wall problems, the interior repair sequence using BUTABOND SBR bonding, MICROCONE 100PT mortar, and MAZIKCOAT topcoat can significantly reduce visible moisture ingress. For severe basement wall leak repair problems where hydrostatic pressure is the dominant force, a drainage solution alongside the chemical treatment gives the best long-term outcome.
REDWOP’s Complete Wall Protection Range: Products at a Glance
Product | Role in System | Key Performance |
Bond coat + waterproofing compound | Bond strength 3 N/mm², compressive >35 N/mm² | |
Polymer-modified repair mortar | Shrinkage-compensated, 25mm min thickness | |
Acrylic surface putty | 2–3 thin coats, sanded finish | |
Masonry primer (interior + exterior) | 4-hour dry, water-thinnable | |
Elastomeric protective topcoat | UV resistant, CO₂/chloride/sulphate barrier |
These five products form a complete, compatible waterproofing system for walls each tested to work in sequence with the others, rather than being independently chosen from different manufacturers whose chemistries may not be compatible at the interface layers.
As a manufacturer of waterproofing materials and waterproofing products for Indian construction conditions, REDWOP’s range is backed by ISO 9001:2015 quality management, ISO 14001:2015 environmental management, ISO 45001 occupational health, and GEV Ec1 Plus (low-VOC) certification. The water proofing chemical and waterproofing chemical for concrete products in the range comply with relevant IS and ASTM standards, providing engineers and contractors with the documentation trail that specified projects require.
For any project involving waterproofing admixture for concrete, water proofing concrete systems, waterproofing admixture additions, or surface-applied waterproofing materials for walls, REDWOP’s technical team provides site-specific product selection and application guidance across India.
FAQS:-
-
1.What is wall waterproofing and why does it matter in India specifically?
Wall waterproofing is the process of applying materials and systems to prevent moisture from penetrating wall surfaces. In India, the combination of a four-month monsoon season, high coastal humidity, rising groundwater in many regions, and the prevalence of older masonry construction makes this a critical maintenance concern not a cosmetic one.
-
2.What causes white salt patches (efflorescence) on walls?
Efflorescence happens when moisture moves through brick or mortar, dissolves soluble salts, and carries them to the surface. As the water evaporates, it leaves the salts behind as a white, powdery crust. The staining itself is harmless, but it is a clear sign that active moisture is moving through your wall.
-
3.Can I just paint over efflorescence?
No and this is one of the most common and costly mistakes in Indian wall maintenance. Paint applied over active efflorescence will be pushed off by the salts within weeks to months. The wall needs to be stripped to brick, the moisture source addressed, and the repair system applied in the correct sequence.
-
4. What is the difference between interior and exterior wall waterproofing?
Exterior waterproofing stops moisture at the source before it enters the wall. Interior waterproofing controls moisture after it has entered, protecting the interior surface from visible damage. For above-grade walls with surface moisture, exterior treatment is the more effective approach. For basement walls, the choice depends on site access and the severity of hydrostatic pressure.
-
5.What does BUTABOND SBR do that ordinary cement bonding agents don't?
BUTABOND SBR is a polymer-modified SBR latex that creates a chemically bonded interface between old and new concrete or masonry achieving a bond strength of 3 N/mm² that ordinary cement slurry cannot match. It also reduces porosity at the interface, acting as a waterproofing layer in addition to a bonding agent.
-
6.How do I know if my basement wall leak is from hydrostatic pressure or capillary absorption?
Hydrostatic pressure leaks are typically concentrated at floor-wall joints, through cracks, or as active seepage during and after rainfall. Capillary absorption shows as general dampness spreading across a wide area of wall surface, often with efflorescence, and tends to be more diffuse. Both require treatment but through different approaches.
-
7.What is MAZIKCOAT and is it really better than standard masonry paint?
MAZIKCOAT is an elastomeric coating it stretches and returns without cracking as the wall substrate moves. Standard masonry paint has very low elongation and cracks when the substrate moves, creating new moisture entry points. On exterior walls exposed to Indian climate cycles, elastomeric coatings consistently outlast paint-based systems by a significant margin.
-
8.How many coats of WHITPLAST SF putty should be applied?
Two to three thin coats are recommended, with each coat allowed to dry for 20 to 30 minutes before the next is applied. Applying one thick coat instead of multiple thin ones leads to uneven drying and surface cracking.
-
9.Can REDWOP's wall waterproofing system be used on concrete block walls?
Yes the system works on AAC block, fly ash block, clay brick, stone, and concrete block wall substrates. On concrete block walls, the BUTABOND SBR bond coat is particularly important given the higher porosity of block compared to fired brick.
-
10. Do I need to waterproof both sides of a basement wall?
In an ideal world, yes exterior waterproofing on the soil face prevents moisture entry, while interior treatment provides a secondary barrier. On existing buildings where excavation isn't practical, quality interior basement waterproofing with a proper bonding and mortar system significantly reduces visible moisture ingress even without exterior treatment.